Clinic Dashboard — Help & User Guide

Welcome to your DentalMaster patient assistant. This bot chats with your patients in their own language, answers their questions, and creates a lead for every conversation. This guide walks you through each screen of your clinic space.

Sign in at https://bot.dentalmaster.com. Your dashboard opens in your own language (Hebrew and Arabic display right-to-left). The left menu has five sections: Dashboard, Patients / Leads, Questions, Documents, and Settings.

1. Dashboard

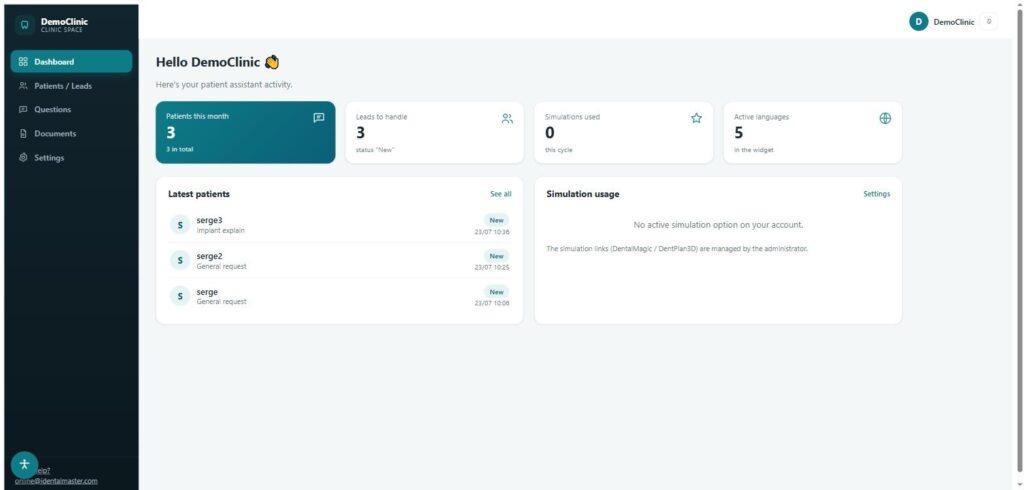
When you sign in you land on the Dashboard. At a glance it shows:

  • Patients this month — total conversations this cycle.
  • Leads to handle — how many still have the status “New”.
  • Simulations used — DentalMagic / DentPlan3D simulations this cycle (managed by DentalMaster).
  • Active languages — how many languages your widget offers.

Latest patients lists your most recent leads, and Simulation usage shows your simulation options. If a simulation option isn’t active, it’s enabled by your administrator.

Clinic Dashboard — activity overview and latest patients

2. Settings — appearance, languages & contact

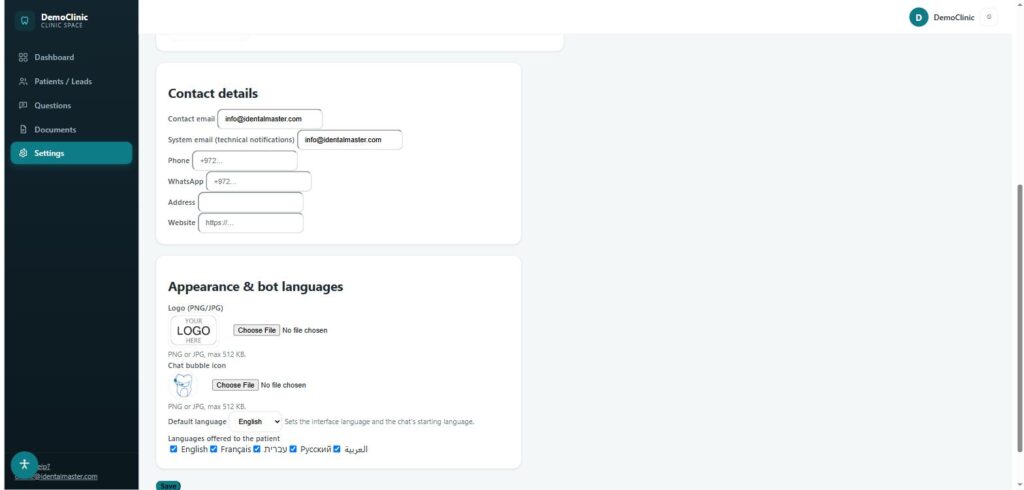
Open Settings (titled Practice settings) to control how your bot looks and who it can reach. Scroll to the lower sections:

  • Contact details — Contact email, System email (technical notifications), Phone, WhatsApp, Address and Website. These power the Call / WhatsApp buttons patients see.
  • Appearance & bot languages — upload your Logo and a Chat bubble icon (PNG/JPG, max 512 KB each), pick the Default language (also the interface language), and tick every language under Languages offered to the patient (English, Français, עברית, Русский, العربية).

Always click Save at the bottom to apply your changes.

Settings — contact details, logo, bubble icon and languages

3. Your chat link & how to share it

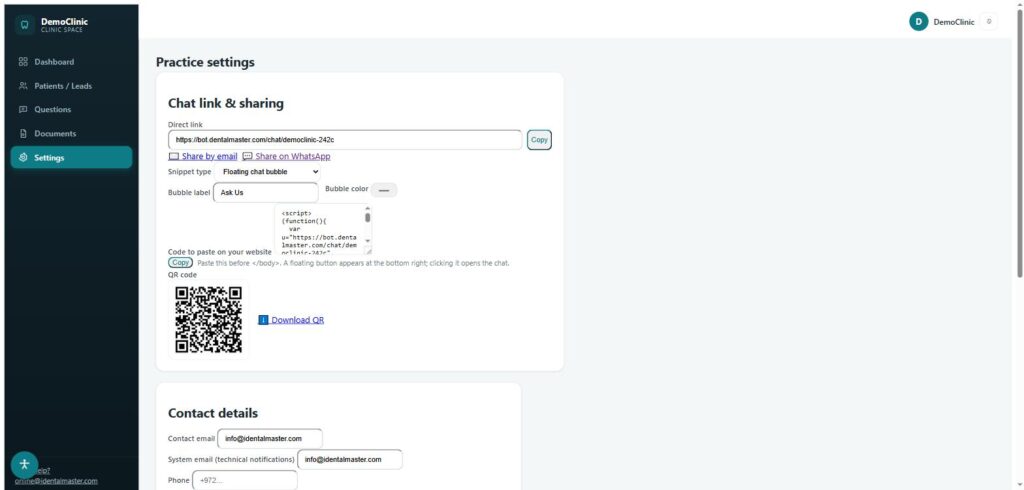
At the top of Settings, the Chat link & sharing panel is how you put the bot in front of patients:

  • Direct link — your public chat address (e.g. /chat/democlinic-242c). Use Copy, or Share by email / Share on WhatsApp.
  • Snippet type — choose Floating chat bubble or iframe. For the bubble you can set the Bubble label (e.g. “Ask Us”) and the Bubble color.
  • Code to paste on your website — copy the snippet and paste it before </body>. A floating button appears at the bottom right and opens the chat.
  • QR code — use Download QR to print it in your clinic or on materials.
Settings — chat link, share buttons, embed snippet and QR code

4. Questions your bot asks

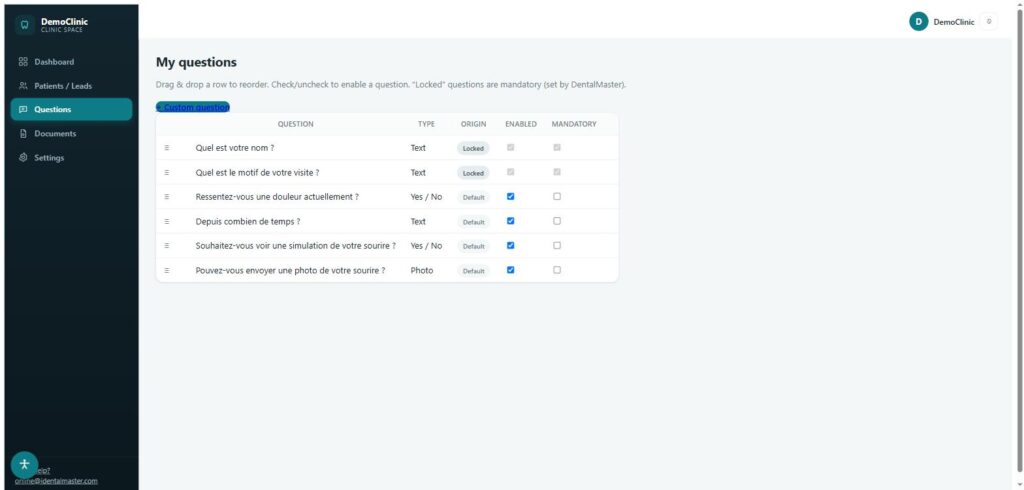
The Questions page (My questions) controls what the bot collects from each patient.

  • Each row shows the question, its type (Text, Yes/No, Choice or Photo), and its origin.
  • Locked questions are set by DentalMaster and are always asked (mandatory) — you can’t disable them. Default questions can be turned on or off with the Enabled checkbox.
  • Tick Mandatory to force the bot to ask a question before the chat can finish.
  • Drag a row by the ≡ handle to reorder the questions.
  • Click + Custom question to add your own.
Questions — reorder by drag & drop, enable/disable, mark mandatory

5. Knowledge base (documents)

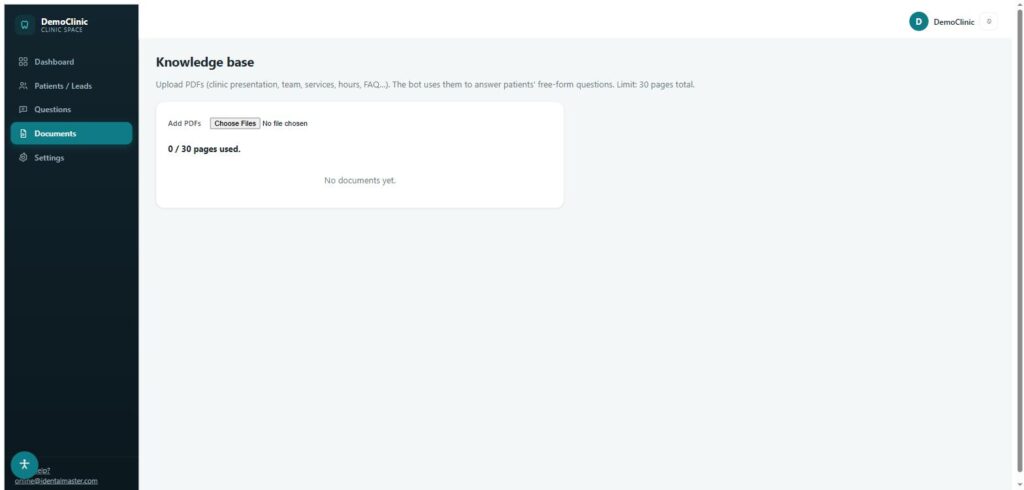
On the Documents page (Knowledge base) you upload PDFs — clinic presentation, team, services, hours, FAQ — and the bot uses them to answer patients’ free-form questions.

  • Click Choose Files and add one or several PDFs.
  • The counter shows pages used out of the limit (30 pages total by default). Pages beyond the limit are not added.
  • You can remove a document at any time.
Knowledge base — upload PDFs the bot reads to answer patients

6. Patients / Leads

Every conversation becomes a lead under Patients / Leads (My leads).

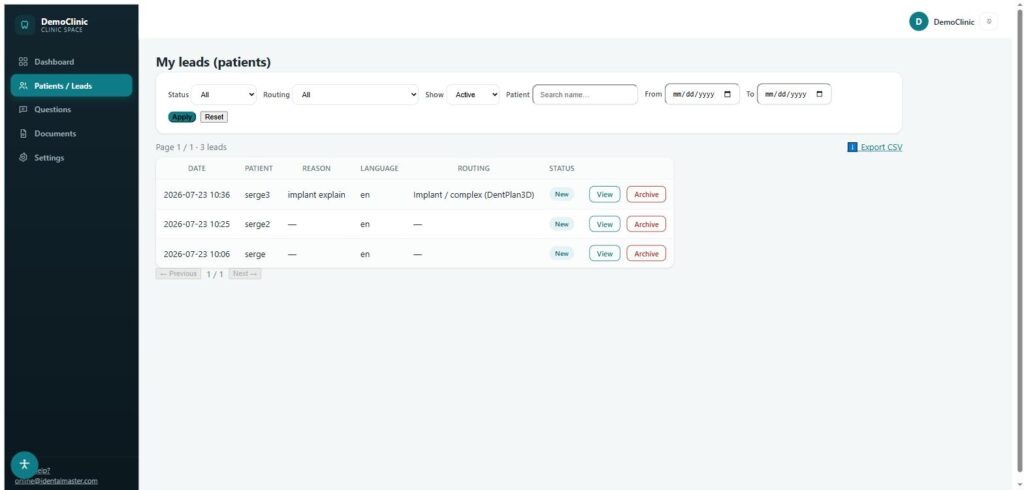
  • The list shows date, patient, reason, language, routing and status. Filter by Status, Routing, active/archived, patient name or date range, then click Apply.
  • Use Export CSV to download your leads, or Archive to hide one from the active list.
  • Click View to open a lead.
Patients / Leads — filter, export and manage every patient

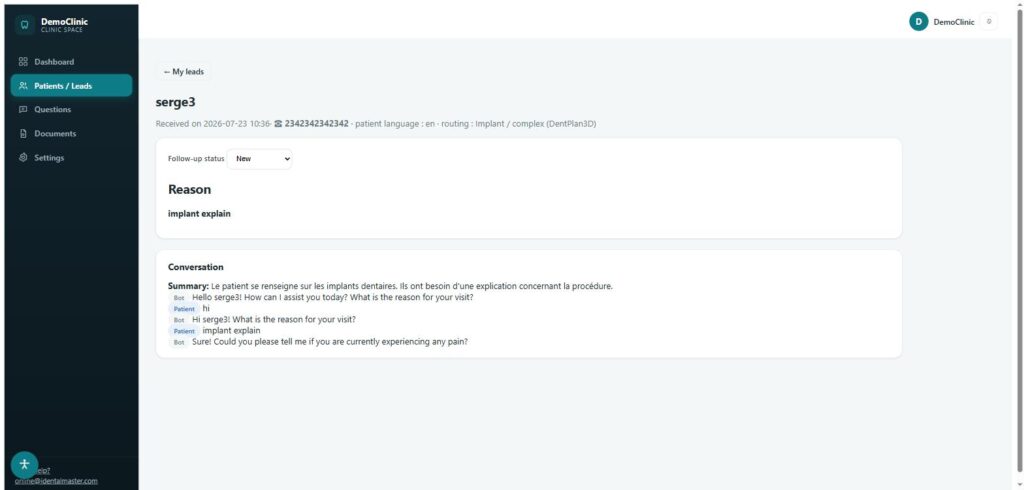
Inside a lead you see the patient’s phone, language and routing, the Reason, and the full Conversation with an AI Summary. Set the Follow-up statusNew → Contacted → Appointment — to track your outreach. You also receive an email for every new lead.

Lead detail — summary, full conversation and follow-up status

Need help?

Questions or need a hand? Email us at online@identalmaster.com — we’re happy to help you get the most out of your patient assistant.

Quick question? Chat with us on WhatsApp